
Spray foam insulation – Detailed Guide about it
The Process of Installing Spray Foam Insulation
Installing spray foam insulation is a great way to improve your home’s energy efficiency and ultimately help minimize expenses on your energy bills. However, it is a process that requires some preparation and planning to be done correctly. This article will walk you through the steps involved in installing spray foam insulation in your home.
The Preparation
- Measure the Area – The first step in installing this type of foam insulation is to measure the area you will be insulating. This will help you to determine how much insulation you will need and what size of spray foam canister you will need.
- Clean the Area – The area where you will install the insulation should be clean and free of debris. This will help to ensure a successful installation.
- Remove any Existing Insulation – If you are replacing existing insulation, you will need to remove it before installing the foam.
- Install the Barrier – A moisture barrier should be installed before applying the foam. This will help to prevent moisture from entering the home and causing problems with the foam.
The Installation
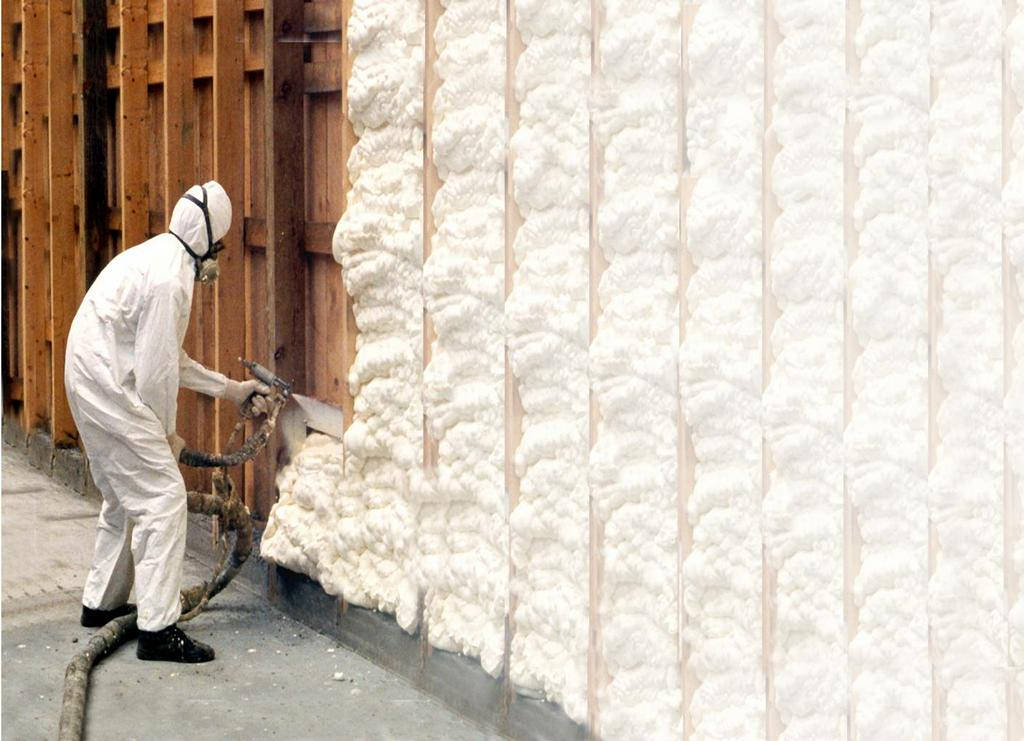
- Open the Canister – Before beginning, ensure that you have read and understood all of the instructions that came with the canister of insulation. Once you have, open the canister and prepare to start spraying.
- Start Spraying – Hold the canister upright and spray in a steady back-and-forth motion. Keep the nozzle about 18 inches away from the spraying surface.
- Apply for Even Coverage – It is essential to apply even coverage when considering Spray foam insulation. If not, it could lead to problems with the insulation later on.
- Let it Dry – Allow the foam to dry completely before moving on to the next step. This can take anywhere from several hours to a few days, depending on the type of insulation used and the weather conditions outside.
The Finishing Touches
- Trim the Foam – Use a sharp knife to trim off any excess foam once the foam has dried. Make sure to leave about an inch of foam around the edge of the area you are insulating.
- Tape Off the Edges – Use painter’s tape to seal off the edges of the insulation. This will help prevent air leaks and ensure the insulation is correctly sealed.
- Enjoy Your New Insulation! – Congratulations! You have now successfully installed insulation in your home. Enjoy improved energy efficiency and savings on your energy bills.
Importance of Hiring a Professional
- Safety – One of the most important reasons to hire a professional when installing spray insulation is safety. Improper installation can lead to serious health hazards, so it is always best to leave it to the experts.
- Experience – Another reason to hire a professional is experience. A professional installer will have the knowledge and experience necessary to install the insulation correctly.
- Quality – When you hire a professional, you can be sure that the quality of the installation will be top-notch. This is because professionals have the proper tools and equipment to do the job correctly.
- Guarantee – Most professional installers offer some guarantee on their work. This gives you peace of mind knowing that if something goes wrong, you are covered.
- Cost – Although hiring an experienced service provider may cost more upfront, it will save you money. This is because they can usually get the job done efficiently, which means less money will be needed to fix any problems that may arise.
Installing spray foam insulation can be daunting, but with this step-by-step guide, you can do it yourself. Make sure to follow all of the instructions carefully and prepare for a safe and successful installation. If you have any questions or concerns, contact a professional installer for help.